Windows and WordPress Plugin Development
I’ve never developed on Windows before, but my workplace is a Windows shop so I’m learning to use it for coding as I go. I’ve already dipped my toe into PowerShell, but I realized I haven’t documented how to get the system ready for WordPress plugin development.
Note: Throughout this guide, we assume that you’re developing a plugin whose
slug is wordpress-plugin.
Requirements
This guide is for Windows 10 and Windows 11. You must have PowerShell 5.1 or later. Run this in your PowerShell terminal to check your version:
$PSVersionTable.PSVersion
Install Software
There are several tools to install before Windows is ready for PHP development.
Windows Terminal
A superior replacement for cmd.exe, Windows Terminal provides a modern tabbed
interface for shells such as Command Prompt, PowerShell, and WSL. This
installation is completely optional, but completely worth it.
Visual Studio Code
My editor of choice is VS Code. It’s excellent and has a large ecosystem of extensions that we’ll leverage later on in this guide.
Coreutils
I couldn’t live without grep. This installs many of the command-line utilities that you’re used to if you’re coming from a UNIX-like operating system.
Git
Git is a basic development tool. You may want to install a GUI as well, but I prefer using the CLI. Install Git using the official native installer.
In addition, I installed posh-git, a prompt module for PowerShell that
displays a Git summary on the command line.
PHP
I installed PVM, the PHP Version Manager for Windows. Even though I only need PHP 8.4 since that’s what’s in production on the lone site I am working on, it doesn’t hurt to be prepared for future compatibility work. PHPUnit 13 (which we will install later) also requires PHP 8.4 or greater.
Using PVM, I was able to install PHP pretty easily:
pvm install 8.4.24 nts x64
pvm use 8.4.24 nts x64
Note that I am running an Arm64 version of Windows 11. Under Arm64 on Win11, x64 binaries run under emulation, but this works just fine. PHP also comes in an x86 variant if you happen to be running an Arm64 version of Windows 10, which only supports x86 (32-bit) emulation.
The nts stands for non-thread-safe, and is probably what you want. Use NTS
for FastCGI/IIS and commonly for CLI use. Use TS when PHP is loaded through
Apache’s multithreaded apache2handler.
Alternatively, you could install PHP using the official Windows ZIP distribution, but I’m not sure how you would manually install and switch between various versions.
Composer
Composer is a dependency manager for PHP. It’s the easiest way to install PHP-related utilities from the command line. We’ll use it to install a few of those later in the guide.
LocalWP
LocalWP is an all-in-one WordPress site development tool. It includes a PHP runtime, web server, database server, and WordPress installation so you can develop your WordPress site without having to host it anywhere. It also features the ability to switch between WordPress, PHP, and SQL versions so you can match your production environment.
Configuring and using LocalWP is outside the scope of this guide, but I wanted to include it here so that you have a place to test your plugin as you develop.
Configure Source Control
Once all of the software is installed, it’s time to get the development environment ready.
Prepare Repository
The first step is to create the directory that will be your main project.
After that, inside the directory, create a README.md file and put something
inside of it, then initialize Git.
mkdir wordpress-plugin
cd wordpress-plugin
echo '# wordpress-plugin' > README.md
git init
Set Up SSH Key
This guide uses SSH to communicate with GitHub, so you’ll need an SSH key pair.
Fortunately, ssh-keygen.exe is included with Windows these days.
ssh-keygen.exe
Once the keys are generated, add the public key to GitHub (Settings > SSH and GPG Keys).
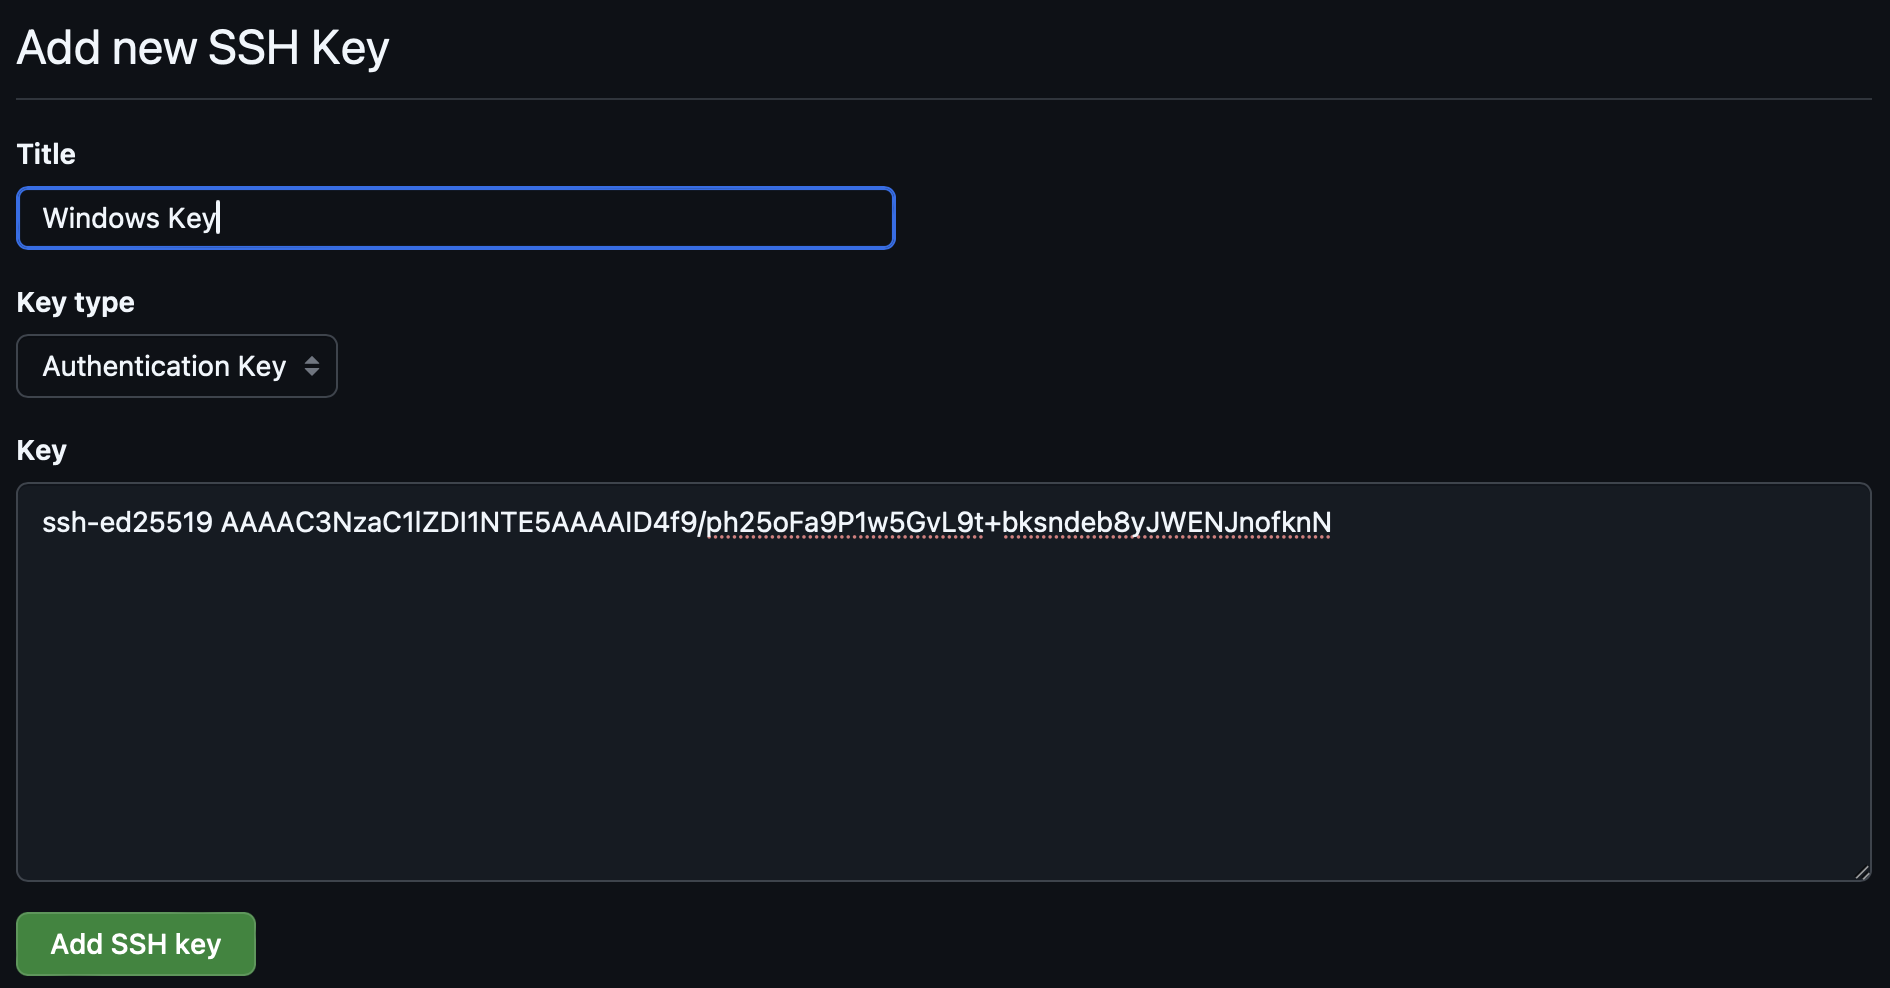
Now verify the key is working:
ssh -T git@github.com
Set Up GitHub Repository
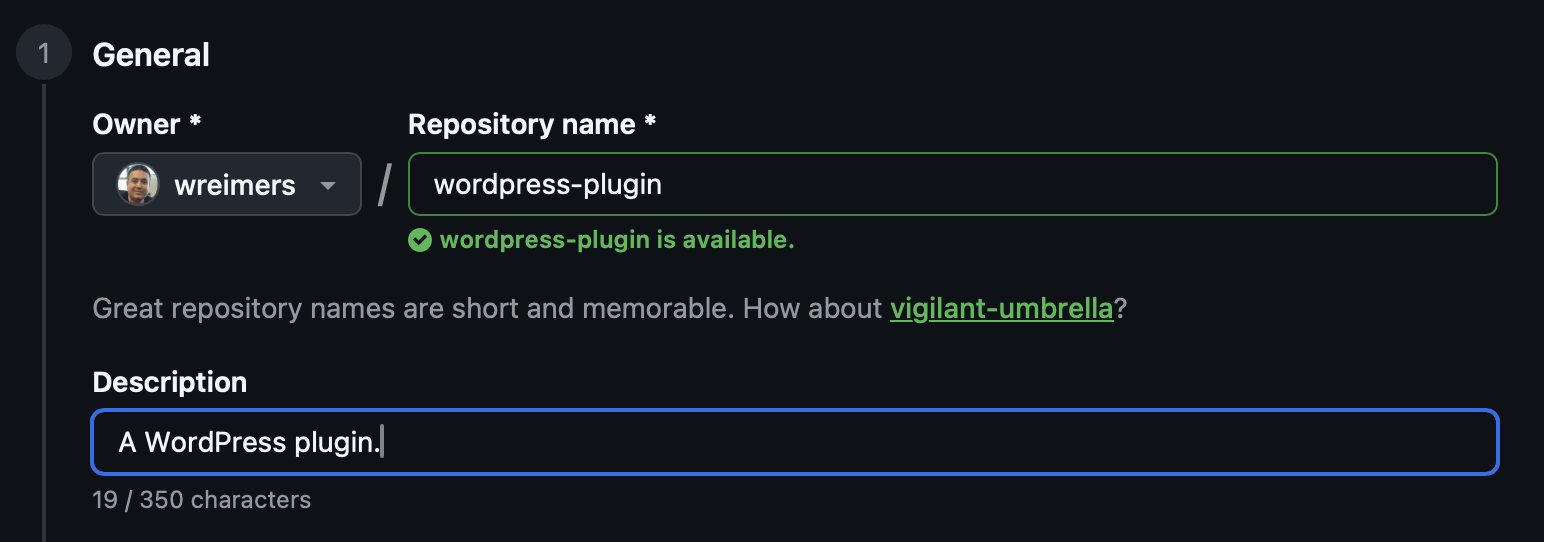
Log in to GitHub and locate the “+” icon in the upper-right corner of the page. Click it and select “New repository.” Give it a name (and a description if you want). I leave the rest of the settings at their defaults, since I’ll be creating the repository locally.
Configure Identity
You’ll need to configure Git with your name and email address before using it.
git config --global user.email "your@email.address"
git config --global user.name "Your Name"
Configure Line Endings
You can also configure Git and VS Code to only use LF line endings instead
of the Windows default CRLF.
git config --global core.autocrlf false
git config --global core.eol lf
Add a .gitattributes file to the project root:
* text=auto eol=lf

*.png binary
*.jpg binary
*.gif binary
*.zip binary
Create a folder in the project root called .vscode and create a file called
settings.json in it. Put this inside:
{
  "files.eol": "\n"
}
Commit and Push
Once you’ve got that done, make your first commit, add the remote, and push to your shiny new GitHub repo.
git add README.md
git commit -m "Initial commit"
git branch -M main
git remote add origin git@github.com:username/wordpress-plugin.git
git push -u origin main
.gitignore
At this point, you may want to create your .gitignore file. Composer installs
its files into the .\vendor\ directory, and you don’t want to commit that
directory to source control. Take a moment and exclude a few items from Git.
Here is what mine looks like:
/vendor/
/build/

.DS_Store
Thumbs.db

*.log

# PHPCS reports
phpcs-report.txt
phpcs.xml

# PHPUnit
.phpunit.cache/
.phpunit.result.cache
Commit .vscode\settings.json, .gitignore, and .gitattributes right away.
Add Development Files
You’re going to need a couple of additional folders and files to get your environment up and running.
You’ll need a wordpress-plugin.php file to bootstrap the plugin. The name
depends on the slug you’ve chosen for your plugin.
touch wordpress-plugin.php
Put the following in the file:
<?php
/**
 * Plugin Name:       WordPress Plugin
 * Description:       A sample WordPress plugin.
 * Version:           0.1.0
 * Requires PHP:      8.4
 *
 * @package WordPressPlugin
 */

declare( strict_types=1 );

if ( ! defined( 'ABSPATH' ) ) {
	exit;
}

/**
 * Plugin version.
 */
define( 'WORDPRESS_PLUGIN_VERSION', '0.1.0' );

/**
 * Plugin directory path.
 */
define( 'WORDPRESS_PLUGIN_PATH', plugin_dir_path( __FILE__ ) );

/**
 * Plugin directory URL.
 */
define( 'WORDPRESS_PLUGIN_URL', plugin_dir_url( __FILE__ ) );

/**
 * Bootstrap the plugin.
 */
function wordpress_plugin_bootstrap(): void {

}

add_action(
	'plugins_loaded',
	'wordpress_plugin_bootstrap'
);
The rest of the plugin code will go in the includes directory:
mkdir includes
touch includes\class-example.php
Put the following in includes\class-example.php:
<?php
/**
 * Example class.
 *
 * @package WordPressPlugin
 */

declare( strict_types=1 );

/**
 * Example class.
 */
final class Example {

	/**
	 * Format a greeting.
	 *
	 * @param string $name Name to greet.
	 * @return string
	 */
	public function greet( string $name ): string {
		return sprintf( 'Hello, %s!', $name );
	}
}
Tests go in the tests directory:
mkdir tests
touch tests\bootstrap.php
touch tests\ExampleTest.php
Put the following in tests\bootstrap.php:
<?php
/**
 * PHPUnit bootstrap.
 *
 * @package WordPressPlugin
 */

declare( strict_types=1 );

if ( ! defined( 'ABSPATH' ) ) {
	define( 'ABSPATH', dirname( __DIR__ ) . DIRECTORY_SEPARATOR );
}

/**
 *  Load Composer's autoloader.
 */
require_once dirname( __DIR__ ) . '/vendor/autoload.php';

/**
 * Load example class.
 */
require_once dirname( __DIR__ ) . '/includes/class-example.php';
Put the following in tests\ExampleTest.php:
<?php
/**
 * Example tests.
 *
 * @package WordPressPlugin
 */

declare( strict_types=1 );

use PHPUnit\Framework\TestCase;

/**
 * Example test class.
 */
final class ExampleTest extends TestCase {

	/**
	 * Example test.
	 */
	public function test_greet_returns_formatted_greeting(): void {
		$example = new Example();

		self::assertSame( 'Hello, World!', $example->greet( 'World' ) );
	}
}
Go ahead and commit these files now.
One note before we continue - the example class and test are WordPress-independent. In order to test plugin files with WordPress globals and functions, you’ll need to install something like Brain Monkey that knows about the WordPress bits, or stub the WordPress functions and globals yourself. I chose the latter route, but YMMV.
Install Development Dependencies
PHP_CodeSniffer
PHP_CodeSniffer (PHPCS) is a linter that checks PHP files for violations of defined coding standards. Use Composer to install it in the project root.
composer require --dev squizlabs/php_codesniffer:"3.*"
Note that the latest version of PHPCS is 4.*, but we are installing 3.* because the VS Code plugin I recommend for PHPCS is incompatible with 4.*.
The next step is to install the WordPress coding standards.
composer config allow-plugins.dealerdirect/phpcodesniffer-composer-installer true
composer require --dev wp-coding-standards/wpcs:"3.*"
composer require --dev phpcompatibility/phpcompatibility-wp
Next, we need to create a configuration file so that PHPCS knows to use the
WordPress standards. In the project root, create phpcs.xml.dist:
<?xml version="1.0"?>
<ruleset name="WordPress Project Rules">
    <description>Custom ruleset for WordPress plugins or themes.</description>

    <!-- Analyze code as PHP 8.4 -->
	  <config name="php_version" value="80400"/>
    <config name="testVersion" value="8.4-"/>

    <!-- Files to scan -->
	  <file>includes</file>
	  <file>tests</file>
	  <file>wordpress-plugin.php</file>

    <!-- Exclude vendor directories -->
    <exclude-pattern>*/vendor/*</exclude-pattern>

    <!-- Only scan PHP files -->
    <arg name="extensions" value="php"/>

    <!-- Show progress and colors in output -->
    <arg value="ps"/>

    <!-- Enforce the full WordPress Coding Standards -->
    <rule ref="WordPress"/>

    <!-- PHPUnit uses PSR-style names for test files/classes. -->
    <rule ref="WordPress.Files.FileName.NotHyphenatedLowercase">
      <exclude-pattern>tests/*</exclude-pattern>
    </rule>

    <rule ref="WordPress.Files.FileName.InvalidClassFileName">
      <exclude-pattern>tests/*</exclude-pattern>
    </rule>

    <!-- PHP compatibility -->
    <rule ref="PHPCompatibilityWP"/>

    <!--
      The Squiz @throws sniff does not recognize exceptions thrown by
      internal PHP functions (e.g. json_decode() with JSON_THROW_ON_ERROR).
      Disable it for the test suite.
    -->
    <rule ref="Squiz.Commenting.FunctionCommentThrowTag.WrongNumber">
      <exclude-pattern>tests/*</exclude-pattern>
    </rule>
</ruleset>
One thing to note: I prefer stable dependencies, but at the time of this writing, PHPCompatibility coverage is incomplete for PHP 8.4 unless you install the 3.0 alpha of PHPCompatibilityWP:
composer require --dev phpcompatibility/phpcompatibility-wp:"^3.0@dev"
Next, we need to add PHPCS to VS Code. The best extension I’ve found is:
Install that, and then update your .vscode/settings.json:
{
  "[php]": {
    "editor.defaultFormatter": "valeryanm.vscode-phpsab",
    "editor.formatOnSave": true
  },
  "phpsab.standard": "./phpcs.xml.dist",
  "files.eol": "\n"
}
You can run PHPCS like so:
vendor\bin\phpcs
However, I find it useful to add a Composer script entry so all I have to do is:
composer lint
Add a scripts property to composer.json:
{
  "require-dev": {
    "squizlabs/php_codesniffer": "3.*",
    "wp-coding-standards/wpcs": "3.*",
    "phpcompatibility/phpcompatibility-wp": "^2.1"
  },
  "config": {
    "allow-plugins": {
      "dealerdirect/phpcodesniffer-composer-installer": true
    }
  },
  "scripts": {
    "lint": "phpcs"
  }
}
With that complete, you can commit composer.json, composer.lock,
phpcs.xml.dist, and .vscode/settings.json.
PHPStan
PHPStan is a static analyzer for PHP. It’s great at catching subtle bugs in any PHP codebase. You can use Composer to install this, plus the WordPress and PHPUnit stubs that PHPStan will need for discovery.
composer require --dev phpstan/phpstan
composer config allow-plugins.phpstan/extension-installer true
composer require --dev phpstan/extension-installer
composer require --dev szepeviktor/phpstan-wordpress
composer require --dev phpstan/phpstan-phpunit
composer require --dev php-stubs/wordpress-tests-stubs
Next, add a configuration file at the root of the project, phpstan.neon.dist.
As you can see, PHPStan uses a file format called NEON
which is very similar to YAML. Copy the following into the file:
parameters:
  level: 6
  paths:
    - includes/
    - tests/
    - wordpress-plugin.php
  scanFiles:
    - vendor/php-stubs/wordpress-tests-stubs/wordpress-tests-stubs.php
PHPStan has levels 0-10, with 10 being the strictest. If you want to, you can start at 0 and fix the reported problems, then increase the level one step at a time.
Finally, add a Composer script entry. This is where having a script entry
helps, because PHPStan can require additional memory on larger projects, and
you can just add it to the script entry instead of having to remember it every
time. This is the updated composer.json scripts property:
  "scripts": {
    "lint": "phpcs",
    "check": "phpstan analyse --memory-limit=1G"
  }
Now you can invoke it with:
composer check
Commit phpstan.neon.dist, composer.json, and composer.lock.
PHPUnit
PHPUnit is a testing framework for PHP. As the name implies, it’s particularly adept at facilitating unit tests. I use it extensively, and I have far more testing code than I do production code. This example setup enables pure unit testing of WordPress-independent PHP code.
Once again, use Composer to install it:
composer require --dev phpunit/phpunit
Create a configuration file called phpunit.xml.dist:
<?xml version="1.0" encoding="UTF-8"?>
<phpunit
    xmlns:xsi="http://www.w3.org/2001/XMLSchema-instance"
    xsi:noNamespaceSchemaLocation="https://schema.phpunit.de/13.0/phpunit.xsd"
    bootstrap="tests/bootstrap.php"
    colors="true"
    cacheDirectory=".phpunit.cache"
    executionOrder="depends,defects"
    beStrictAboutTestsThatDoNotTestAnything="true"
    failOnRisky="true"
    failOnWarning="true"
>
    <testsuites>
        <testsuite name="WordPress Project Test Suite">
            <directory>tests</directory>
        </testsuite>
    </testsuites>

    <source>
        <include>
            <directory>includes</directory>
            <file>wordpress-plugin.php</file>
        </include>
    </source>
</phpunit>
And make a script entry in composer.json:
  "scripts": {
    "lint": "phpcs",
    "check": "phpstan analyse --memory-limit=1G",
    "test": "phpunit"
  }
Your complete composer.json should look like this:
{
  "require-dev": {
    "squizlabs/php_codesniffer": "3.*",
    "wp-coding-standards/wpcs": "3.*",
    "phpstan/phpstan": "^2.2",
    "phpstan/extension-installer": "^1.4",
    "szepeviktor/phpstan-wordpress": "^2.0",
    "phpcompatibility/phpcompatibility-wp": "^2.1",
    "phpstan/phpstan-phpunit": "^2.0",
    "php-stubs/wordpress-tests-stubs": "^7.0",
    "phpunit/phpunit": "^13.3"
  },
  "config": {
    "allow-plugins": {
      "dealerdirect/phpcodesniffer-composer-installer": true,
      "phpstan/extension-installer": true
    }
  },
  "scripts": {
    "lint": "phpcs",
    "check": "phpstan analyse --memory-limit=1G",
    "test": "phpunit"
  }
}
And then you can invoke it using:
composer test
Commit phpunit.xml.dist, composer.json, and composer.lock.
Verify Installation
Make sure you verify your installation!
git --version
php --version
composer --version
vendor\bin\phpcs --version
vendor\bin\phpstan --version
vendor\bin\phpunit --version
composer lint
composer check
composer test
Profit
You now have the foundation of a WordPress plugin development environment, complete with linting, static analysis, and automated testing. The setup is lengthy, but these tools can prevent defects even in a small plugin.
Go forth and develop WordPress plugins on Windows!